Gives intelligence about which suburbs enquiries, applications and offers are being received/accepted and shows how particular suburbs are growing or shrinking.
Why do my numbers not add up
- The numbers in this report are based on EnrolHQ profiles with "postcode" answer registered
For example: The residential "postcode" question is not answered for certain profiles which results in the student number on the report being different from the total number of submitted forms
Click on Settings > Form Fields > Address > Postcode to enable this question
- The numbers are restricted by the selected timeframe
For example: You have put a date range restriction between Jan 2024 - July 2024 and will not see any numbers for 2023
- Numbers might not match due to students enrolling prior to EnrolHQ, having manually entries
What is Student Geo Data Report
The Geo Data report shows which suburbs and postcodes your students are coming from and if these suburbs/postcodes are growing or shrinking vs a period in the past.
You can sort the student numbers based on different actions to see a factual overview of how students in each stage of the enrolment process are connected to a certain suburb.
What can you see:
- Top suburbs and postcodes based on student numbers
- Growing suburbs vs shrinking suburbs
- Which suburbs are your enquiries coming from
- Which suburbs are your event bookings coming from
- Which suburbs are your applications coming from
- Compare student numbers for each suburb against total enquiry/event/application/offer numbers year against year
How it works:
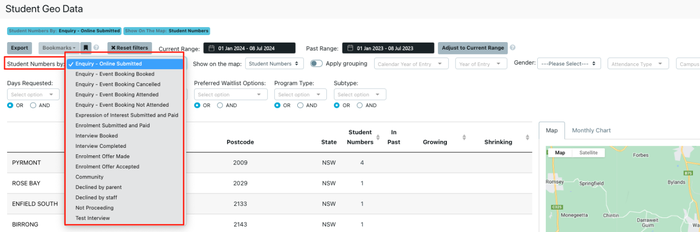
- Select what stage/action you want to report on
- Choose a current and past timeframe to compare against
- Apply any additional filters for more detailed information
- If the student has a postcode registered and has done the action you have selected within the selected timeframe, the report will display a number 1 in the respective suburb and postcode column in the report
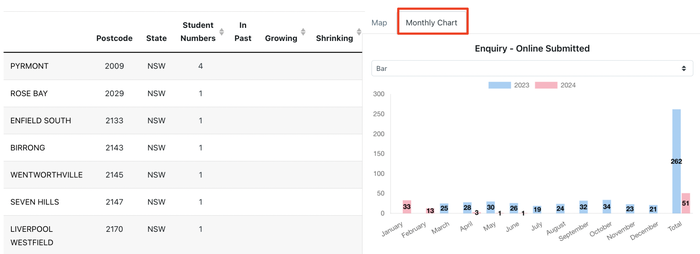
Compare your submissions in a chart
There is also the option to display each stage's student numbers as a Monthly Chart instead of a map view.
How to set up customised suburb groupings
You can add several suburbs or postcodes together so the number that displays in the report includes all these as a group. To do this, go to Settings > Geo Locations Groups
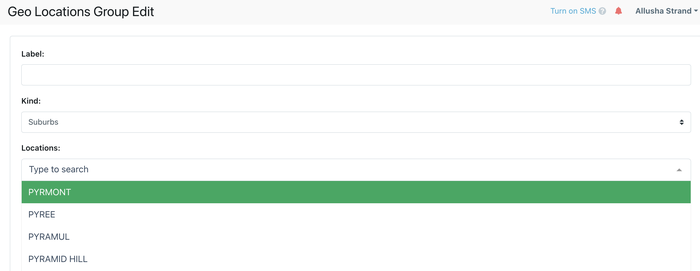
Remember to enable the "apply grouping" setting in the Geo Data report to activate your customised groupings.
Filters
All of the filters available are the same as provided in Student Status Conversion.
Year of Entry, Calendar Year of Entry, Gender, Attendance Type and Campus - are standard filters on all EnrolHQ reports that allow you to restrict the results if you have them set up in Settings > School Settings > Attendance Type / Settings > Campuses / Settings > Year of Entry Settings
Student Profile Categories are an additional selector and are only displayed if you have them setup in Settings > School Settings > Student Profile Categories
Tip: all the information highlighted in Blue is the current selection being displayed, as you add additional selections they are added adjacent to the original selections.
Export - allows the selection you have made available in XML format

Bookmarks - allows you to save a particular set of filters to be used in the future

Reset Filters - allows you to remove all your selected filters (this is a good idea in case you have inadvertently selected a filter that affects your reporting)

Stages - allows you to select what information is displayed. Read more about stages and how they work here: Student Profile Conversion Report
Current Range - select the reporting period required. The report will only show student numbers within the selected period
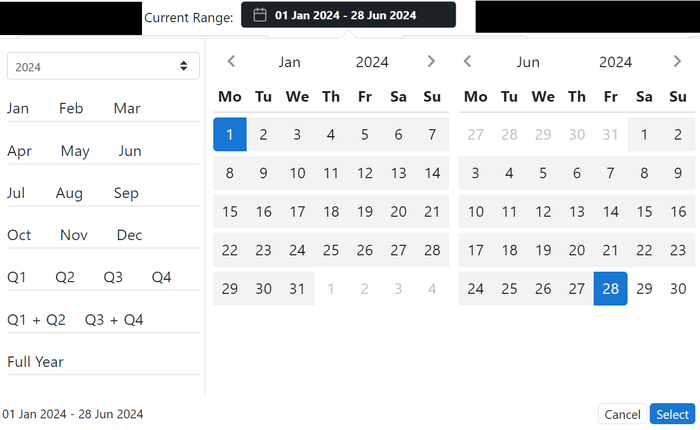
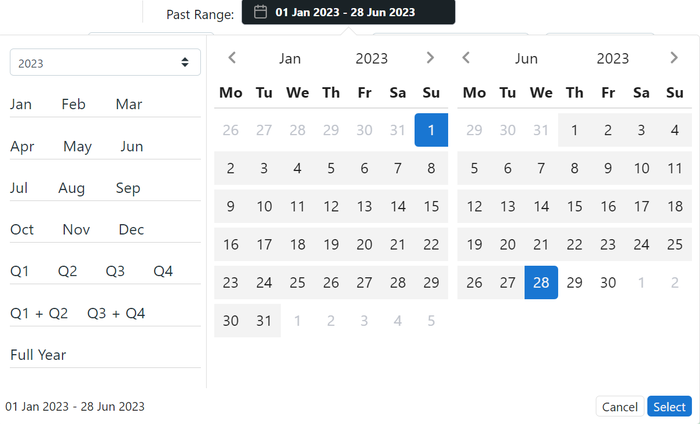
Past Range - necessary when comparing two time periods against each other. Use past range to select the previous time period for comparison
Adjust to Current Range - adjusts the past date range to match the current date range only for the previous year

Show on Map - select what type of information you want to show on the map

Apply Grouping - if you have applied customised grouping selections under Settings > Geo Location Groups - the grouping can be enabled/disabled using this setting

Postcode - the option to search and select a specific postcode
