Before you can have interviews you need to set up the personnel to handle them. This article gives instructions on how to set up interviewers.
How to set up interviewers
When setting up non-enrolments staff as Interviewers the the Interviewer settings need to be adjusted, this is done once according to the individual School/College access specifications. Below are samples of the setting to limit access for staff conducting Interviews.
Go to Users > Roles and Permissions and Select Interviewer
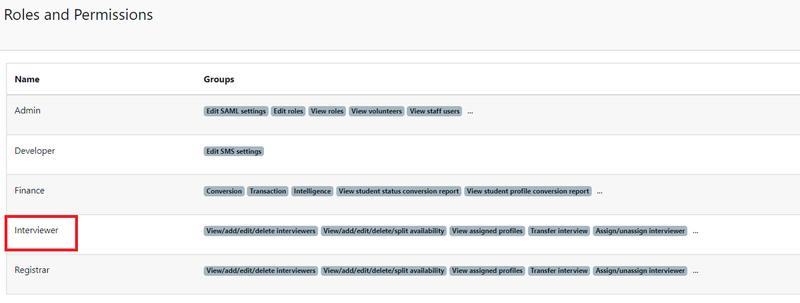
There are many groups however the ones to manage are Interview, Custom Forms, Reports and Application.
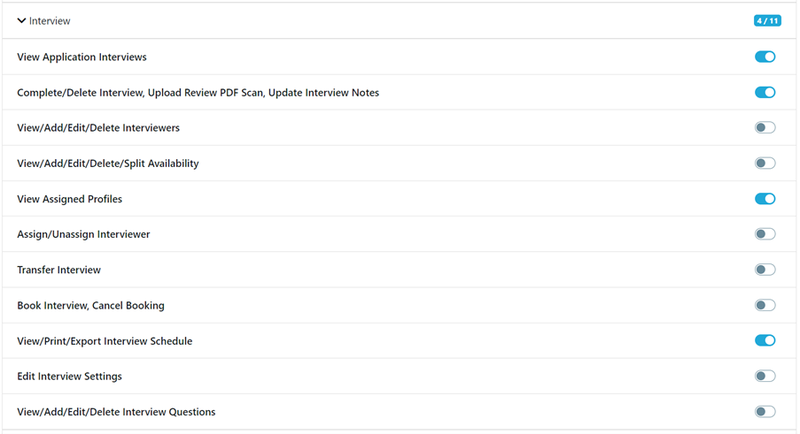
Select Interview and adjust the settings as required - displayed are the recommended settings.
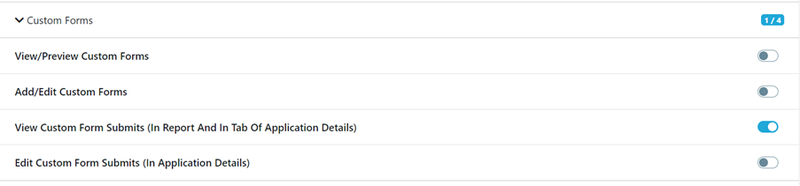
Select Custom Forms and adjust the settings as required.
Select Application and adjust settings as required.
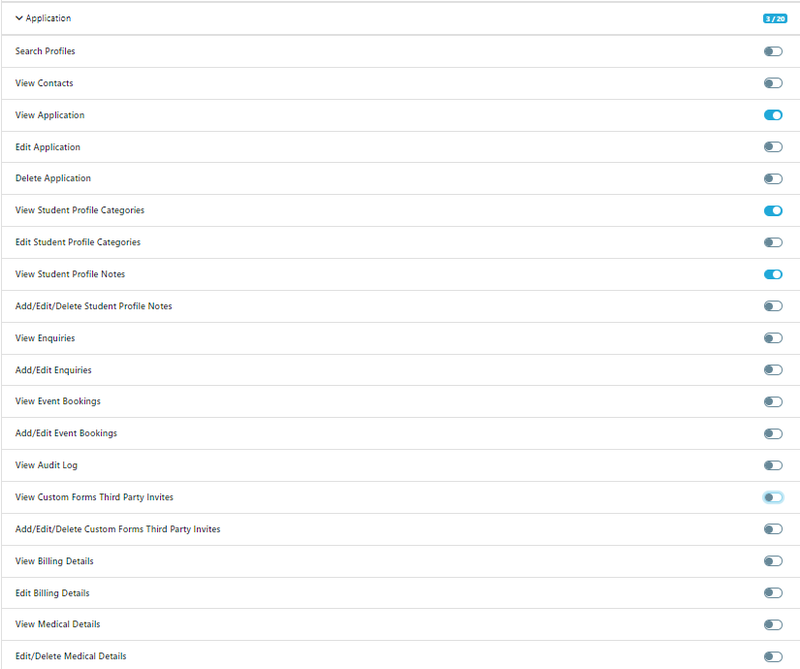
Make sure you save all your changes to the settings.
If staff outside Enrolments are conducting Interviews they must be setup as a user with login to EnrolHQ if you are not sure how to complete this please access this link - How to add users in EnrolHQ
If you are using SSO then your IT department must ensure access to the Interviewer has been granted for them to have access to EnrolHQ.
After the correct access levels have been set for Interviewers, the next step is to create them as Interviewers.
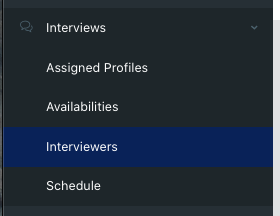
Go to Interviews > Interviewers
This ensures the Interviewer can access to information related to their interview such as reports and notes previously made regarding the student as well as the ability to add the interview notes to the student record.
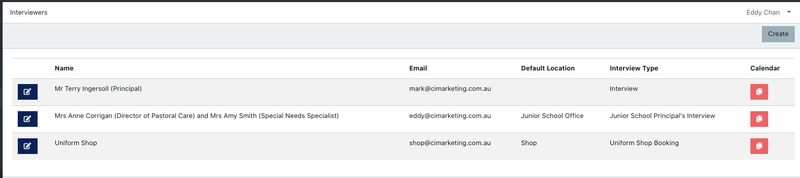
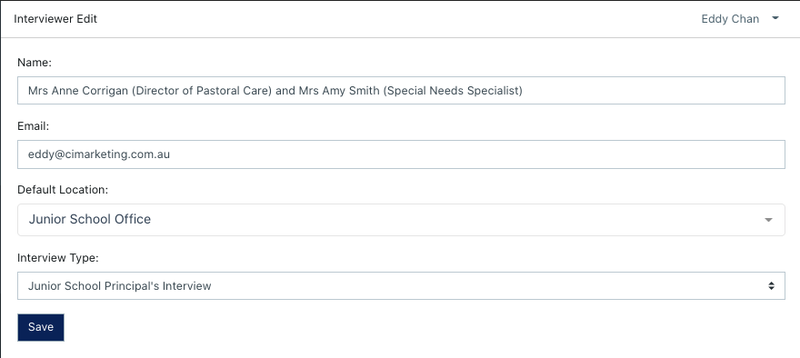
Add a new interviewer by clicking the “Create” button and input the name, email address, default location and interview type. If two interviewers will be present, you can put both of their names in, then this will show Parents that their interviewers are "Mrs Anne Corrigan and Mrs Amy Smith".
The email address should be the individual that is conducting the interviews email address as they will receive notifications regarding the interview and any relevant changes (cancellations or time changes)
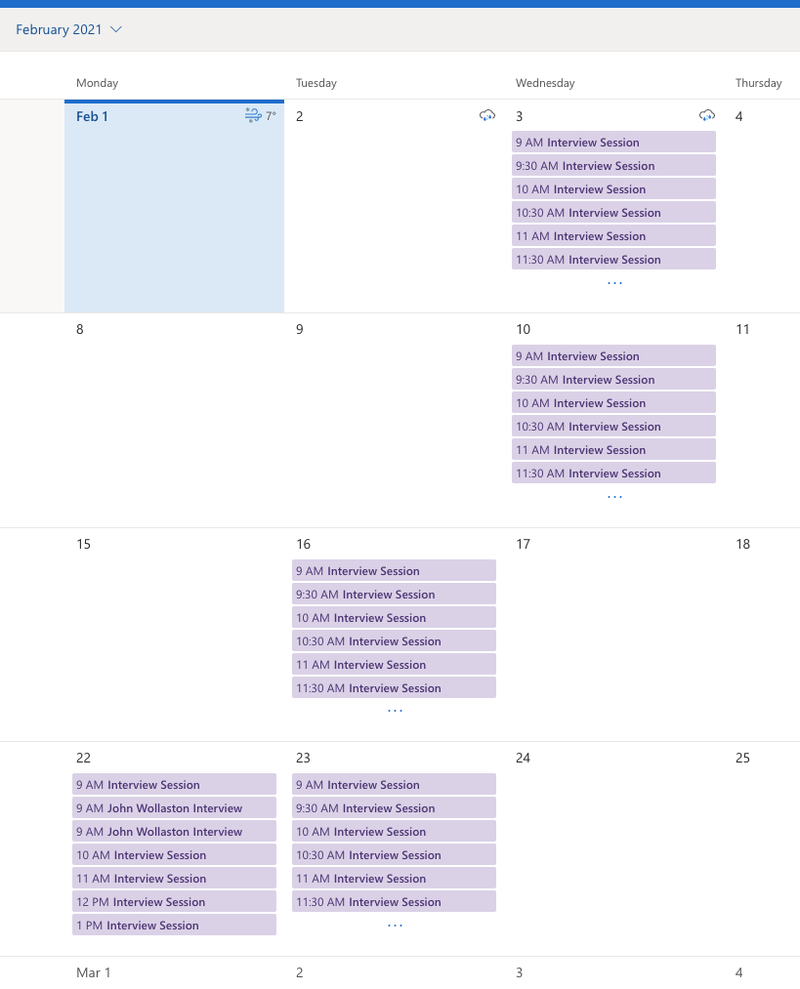
After you’ve finished setting up your interviewers you will notice in the list that there’s a ‘Calendar’ button on the far right. Click this to copy the calendar feed to paste into Outlook. Once you click the button to copy you can paste it into an email and send it to the interviewer.

The interviewer will open Outlook to “add a new calendar from the internet” like so:
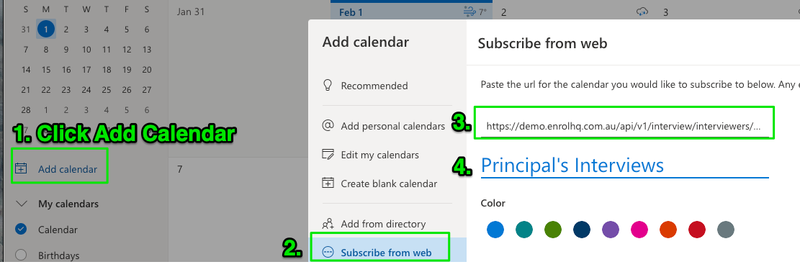
Paste in the link copied from EnrolHQ to the internet calendar field. The unbooked, as well as the booked interview slots, will show up in the calendar after the feed is added. Unbooked sessions are labelled "Interview Session" while booked sessions will have the student's name added.