How to change settings to your preference. Please note that this is by individual users. i.e. if one staff member changes their default setup it doe not affect others login's.
All Users field Customisation link to all Table Columns / Tabs
If you want to standardise all the User fields within your EnrolHQ you can do this by going to Settings > Table Column / Tabs
You can complete your setup in one location by accessing all the customisation areas here.
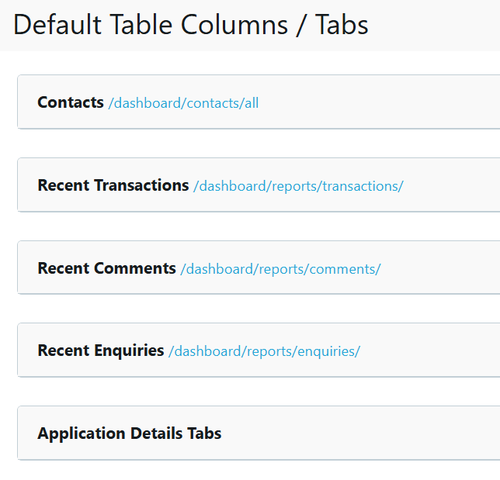
- Contacts
- Recent Transactions
- Recent Comments
- Recent Enquiries
- Applications Details Tabs
All the tables have the same selection options available
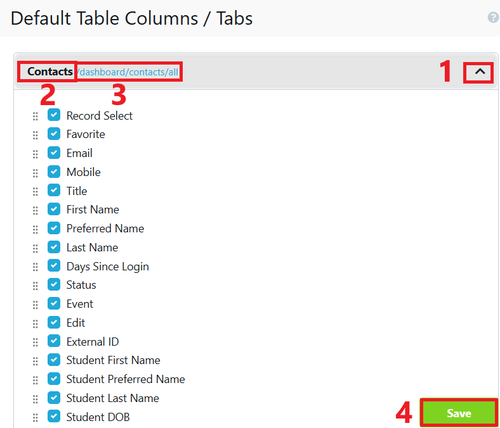
- If you wish to alter the settings for all users expand the selection here
- This shows the user setting you are altering
- If you wish to alter your own user settings go to the location and alter the setting use this link (it will open another tab)
- Save to ensure the changes take effect.
Contact Column Customisation
Please note that this feature is linked to each individual user.
i.e. if one staff member changes their column setup it does not affect any other staff users.
Background
Each individual EnrolHQ user may have different needs or preferences when it comes to viewing Contact details in the list view. This article explains how to make a change individually for each user by either re-ordering the column or turning off columns to suit.
When you select Contacts > All Prospective this is the standard display list and order of the Columns.
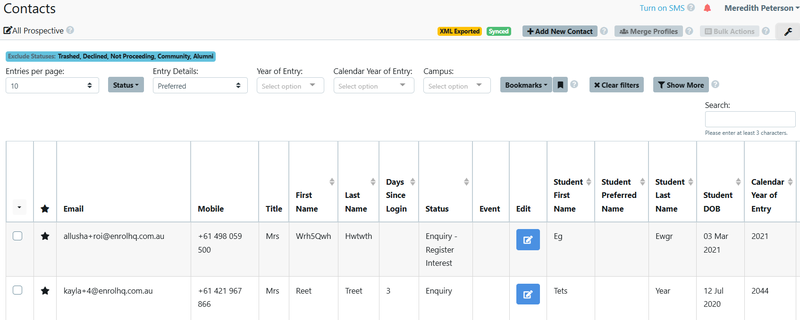
Once you are in the All Prospective view you can complete your customisation.
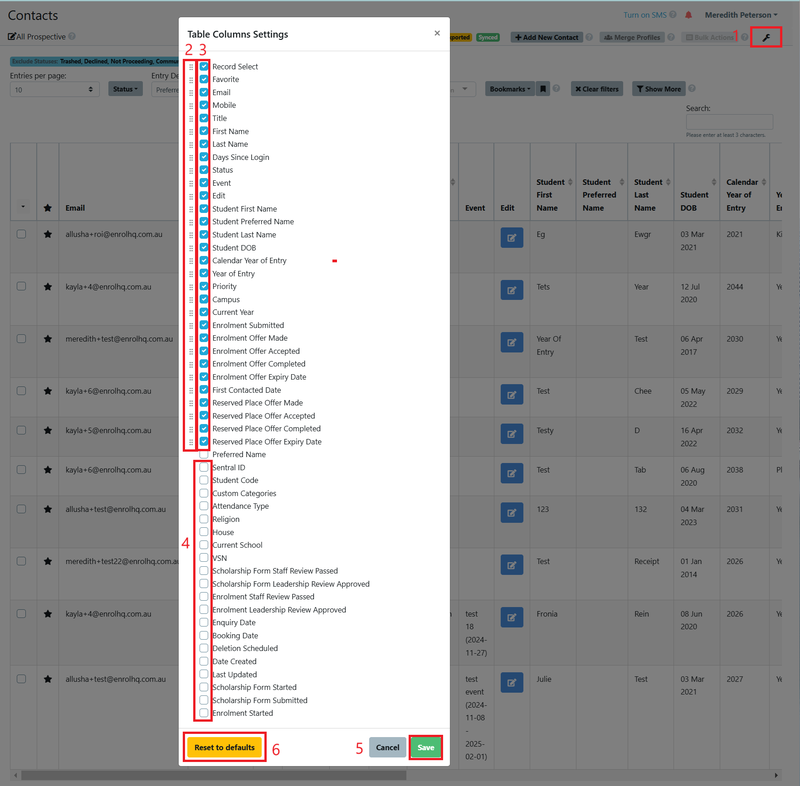
Steps to Take
- Select the spanner Icon to display the list of columns.
- Use the first column to drag and drop the column to the location that best suits your use of EnrolHQ.
- Deselect a column unticking that column.
- Select a column ticking that column.
- Save.
- If you want to return the settings to the system default select this button option, you will be asked if you are sure.
Transaction Report Column Customisation
Each individual user may have different needs or preferences when it comes to viewing the Financial transaction details in the Transaction Report. This is how to make the changes individually for each user by either re-ordering the column or turning off them to suit.
Go to Reports > Transactions.
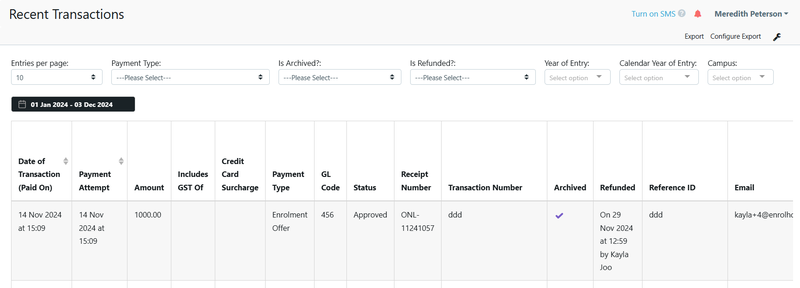
Once you are in the Transaction view you can complete your customisation.
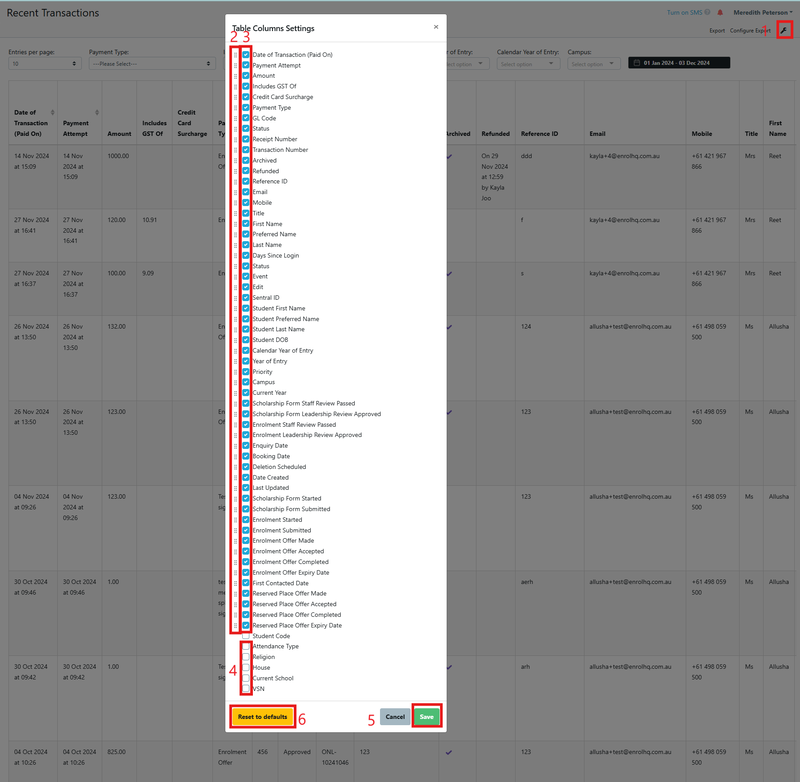
Steps to Take
- Select the spanner Icon to display the list of columns.
- Use the first column to drag and drop the column to the location that best suits your use of EnrolHQ.
- Deselect a column unticking that column.
- Select a column ticking that column.
- Save.
- If you want to return the settings to the system default select this button option, you will be asked if you are sure.
Below is an example of the columns selected and the new view of the Transaction Report.
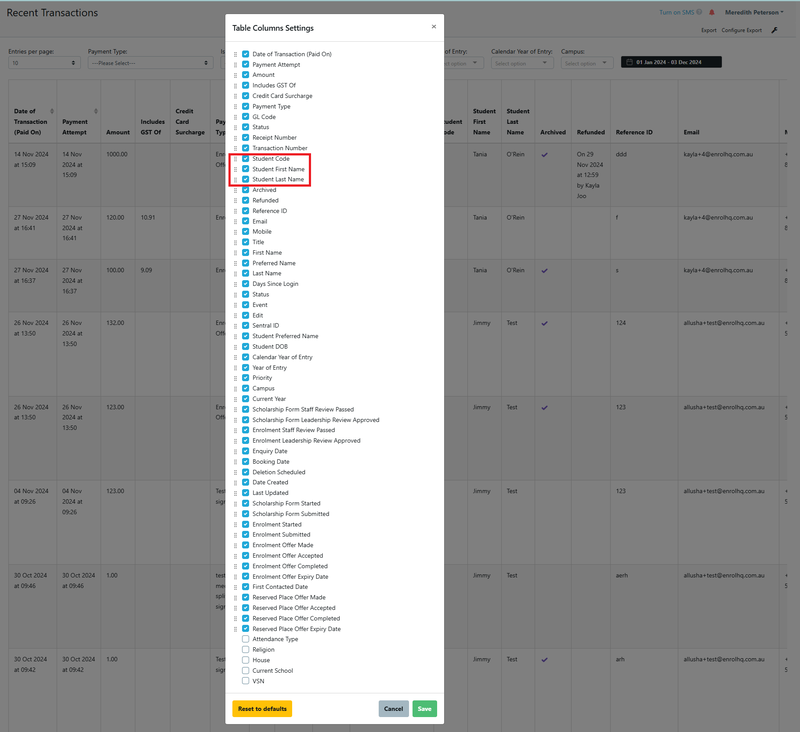

Comments Report Column Customisation
Each individual user may have different needs or preferences when it comes to viewing the comment details in the Comments Report. This is how to make the changes individually for each user by either re-ordering the column or turning off them to suit.
Go to Reports > Comments.

Once you are in the Comments view you can complete your customisation.
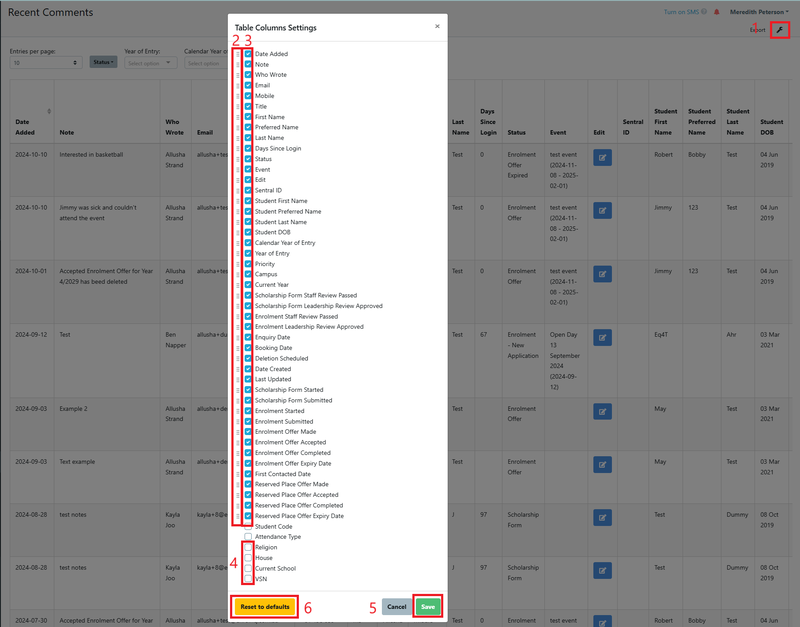
Steps to Take
- Select the spanner Icon to display the list of columns.
- Use the first column to drag and drop the column to the location that best suits your use of EnrolHQ.
- Deselect a column unticking that column.
- Select a column ticking that column.
- Save.
- If you want to return the settings to the system default select this button option, you will be asked if you are sure.
Below is an example of the columns selected and the new view of the Comments Report.


Recent Enquiries Report Column Customisation
Each individual user may have different needs or preferences when it comes to viewing the Enquiry details in the Enquiries Report. This is how to make the changes individually for each user by either re-ordering the column or turning off them to suit.
Go to Reports > Enquiries.

Steps to Take
- Select the spanner Icon to display the list of columns.
- Use the first column to drag and drop the column to the location that best suits your use of EnrolHQ.
- Deselect a column unticking that column.
- Select a column ticking that column.
- Save.
- If you want to return the settings to the system default select this button option, you will be asked if you are sure.
Below is an example of the default columns. Note: if the filed names have been updated via customisation they will list according to your setup.
